From time to time you might want to make big changes to your server, changes that might involve risking server stability. You might also want try another Operating System (Switch from Debian to Ubuntu or vice versa) or upgrade from 32Bit OS to 64 Bit OS. Most of these tasks involve the risk of big downtime. I am going to outline a few simple steps to keep downtime to an absolute minimum no matter how big the Upgrade or problem. This Tutorial might seem a bit long winded but it is aimed at the complete novice. After you have done this once, the whole process will take no more than 5 minutes.
Tools you will Need:
a)…Hiren’s Boot DVD 15.1 Restored Edition V 2.0 (Not the genuine version)
Click on the link below to open up a google search window with results for the Torrent file we need (If you wish, you can change “KAT” at the end to your preferred torrent site)
Make sure it is the restored edition, this edition includes all the commercial software that you don’t get with the official Hiren’s Boot DVD.
b)… Blank DVD
c)… USB Key or portable Hard Drive to store the Backup’s on. (I use 8GB USB Key)
Step 1 (Burning the DVD)
Within the folder you will find the “hbcd-15.1-Restored-V2.0-dvd-proteus.iso”. Insert your Blank DVD & burn this iso to a blank DVD with your favourite DVD burning software. (I use windows Disk burner included in Win7, Just right click on the file & click burn disk image) You now have your Hirens Boot DVD.
Step 2 (Creating the backup)
For this step you will need a keyboard, mouse & monitor connected to your Server.
a)… Put the DVD into your server & click CTR+ALT+DEL to restart Server
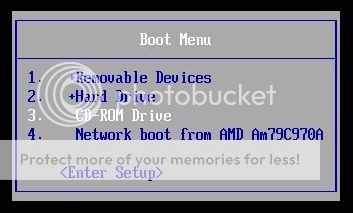
b)… Press F12 at boot logo Screen to select Boot Device (Might be different on different Systems)
c)… From Boot Device Menu Select CD\DVD Drive & hit enter (This will boot your server from the DVD)
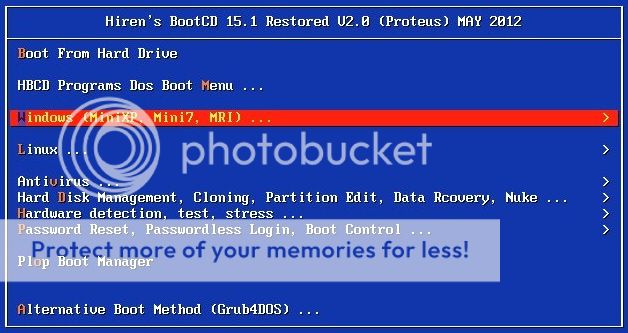
d)… From the first screen, select Windows (Mini-XP, Mini7, MRI)
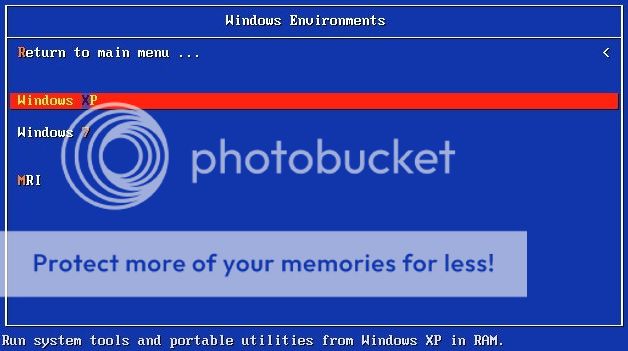
e).. From the next screen select Windows XP
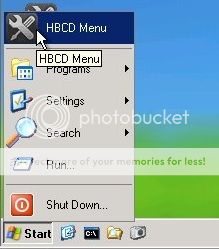
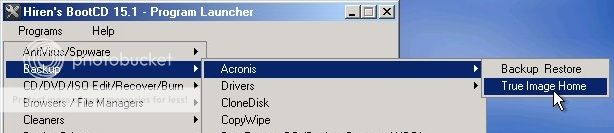
f)… When the Mini XP OS loads, click on the Start button and HBCD
g)… From the HBCD select programs / Backup / Acronis / True image Home
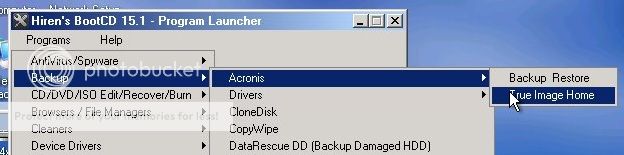
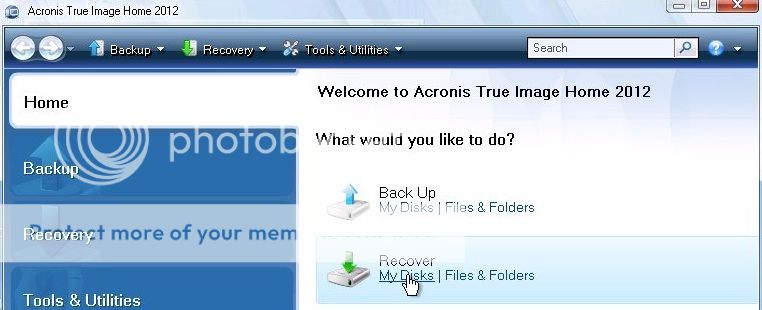
h).. When Acronis True image Home loads, click Backup My Disks
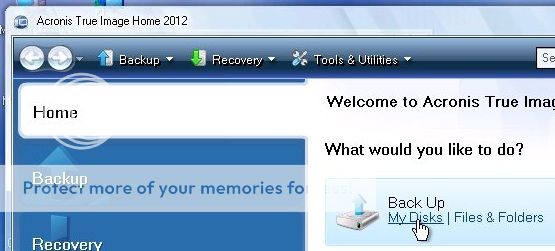
i).. From the next screen, Select your Ubuntu / Debian hard drive

j).. From the new (Browse for location) window select where you want to store the backup, then in the File name box type a name for the Backup image. I usually use todays date followed by a description of the backup.
e.g.(2012-07-05 Ubuntu 10.04 Oscam Cccam)

k).. Select Create new backup archive and click Next
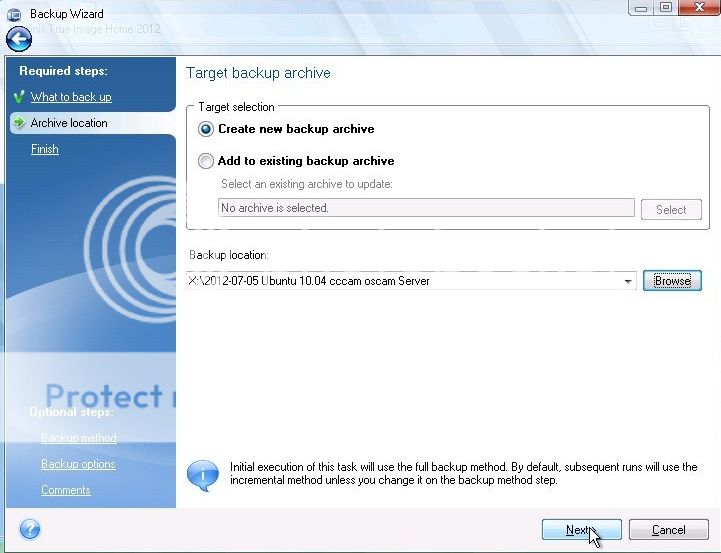
That’s it, your Backup has started, it should take no more than 1-2 minutes.
(Restoring the Backup)
Step 3 (Wiping the existing Linux Disk)
Follow Steps (a) through (f) from Step 2 above to start Hirens Boot CD then follow steps below
i).. From the HBCD select programs / Partition Boot MBR / Par4tition Wizard
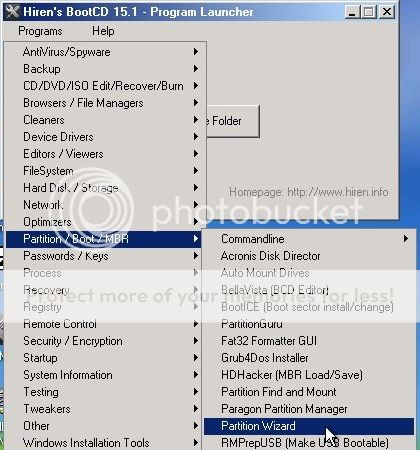
ii).. From the Partition Wizard Window, right click on your Linux Disk and Select Delete all Partitions
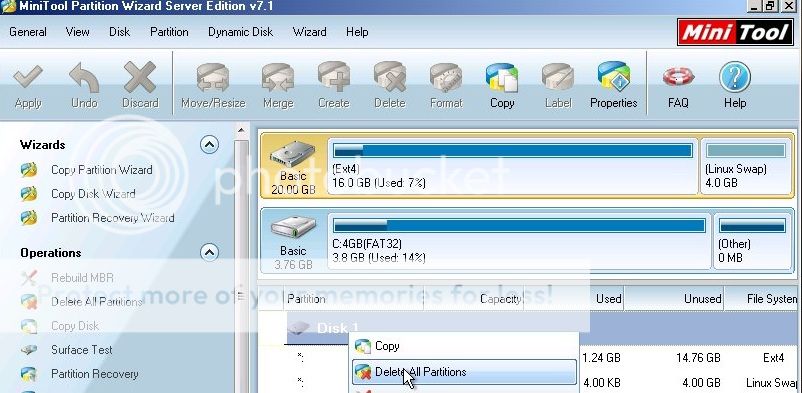
iii).. Next click Apply up the top left and Close down Partition Wizard

Step 4 (Restoring Backup to Wiped Disk)
i).. From the HBCD select programs / Backup / Acronis / True image Home
ii).. When Acronis True image Home loads, click Recover My Disks
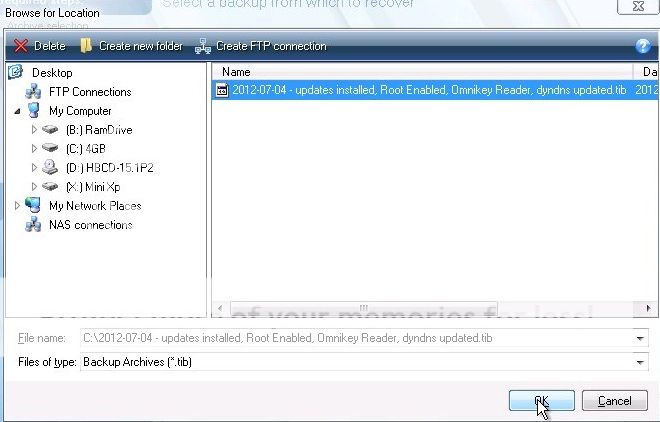
iii) Browse to the backup you want to restore and click OK
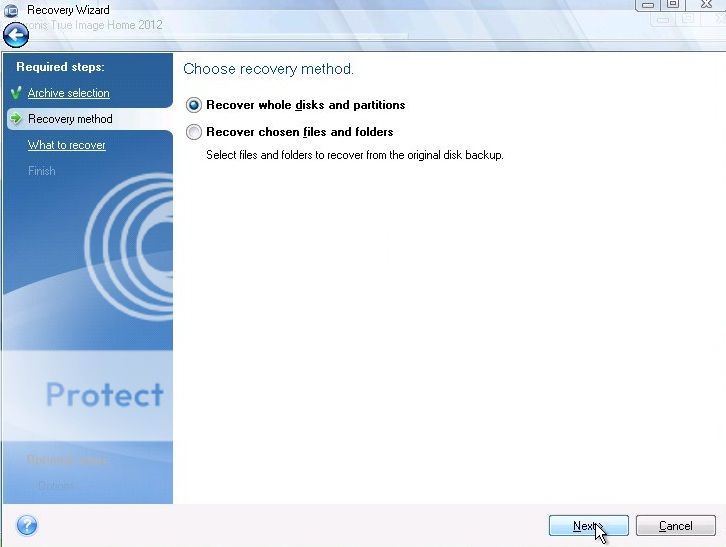
iv).. Click Next on this screen

v).. Select Recover whole disks and partitions and click Next
vi).. Select Disk 1 and make sure to select all partitions below it and click Next

That is the restore process started, again it should take no longer than 2 minutes.
Step 5 Reboot into restored Disk
1).. Remove the DVD
2).. Unplug the USB Backup drive/Key
3).. Click Start / Reboot
That’s it, your Linux System has been restored to the backed up image.
No comments:
Post a Comment